Friday, March 30, 2012

Well Crafted: A Window Display


Last night I attended a window display party at Room Service in Ohio City. The mission was to help craft giant paper flowers based on a tutorial found over on Design Sponge. Crafting and cocktails sounded pretty good to me so I headed on over with a few of my lady friends for a fun night out!


There was one lonely flower in the window when we got there.


Inside there were a lot of busy ladies making these amazing and giant tissue paper flowers.


The bases were made out of chicken wire, cups, tissue paper, and a lot of glue. Some of them were taller than me!


With sangria in hand, my friends and I were assigned to help make the center of the flowers. It took three layers of tissue, glue, and artificial moss to make these beauties. We were fast learners and were quickly promoted to managers of the station, mainly presiding over ourselves.


The night ended with a little shopping, I picked up this cute little coral skirt. Then we stopped by The Bier Markt for a quick bite before heading home. We really had a fun night! Thanks to Danielle and Jennie for the party! Be sure to stop down to check out the new spring merchandise and of course the beautiful window. Happy Friday friends!

Thursday, March 29, 2012

The Black and Gold

I'm feeling inspired by this golden sunshine we are experiencing.

Image Sources: studs // necklace // dress // shoes // ring 

Wednesday, March 28, 2012

Let's Knit a Hair Bow!


If you are anything like me, then you have lots of leftover yarn from completed knitting projects. The yarn has been patiently sitting around waiting to be made into something lovely, your time has come.

So, let's learn how to knit a hair bow. It will be very simple and it help you use up leftover materials that you may have laying around. This little pattern will also help you understand different knitting gauges too if you need a little refresher.


Materials
Scrap yarn of any gauge
Needles to match - do you know how to take your gauge?
Darning needle
Needle & thread
Felt
Snap clip
Hot glue gun


I made two bows with two different types of yarn, Gedifra (#1) and Rowan Big Wool (#2).  For the first bow I wanted to make a 4 x 2 inch rectangle. I cast on 16 stitches on a #7 needle and knit a few rows in stockinette stitch to test out my gauge.  I was getting 4 stitches to the inch so luckily I was right on point and kept knitting until the rectangle measured 2 inches, then bound the stitches off. The second bow measures 3 x 2 inches. I cast on 6 stitches on a #13 needle, my gauge was 2 stitches per inch, knit until desired length and bind off.


Cut a 3 inch piece of yarn, it can be the same or a contrasting piece. Pinch the rectangle in the middle and wrap the strand around the middle. 


Cut a small piece of felt to cover the snap clip and cut a small incision to slip the clip through. Secure with thread or glue. 


Attach the felt and clip to the back of the bow with a loop stitch.


*Let's say it turned out that my stitches looked too loose, then I would have start over on a smaller needle. Or a larger one if they seemed too tight. In this case it doesn't matter too much but if you were knitting a garment and didn't bother to check, then you might end up with a tightly knit, uncomfortable sweater, or a loosely knit garment that was too big! I am a huge advocate of taking gauge, if for nothing else than to say "Ha! I am doing this right!

Tuesday, March 27, 2012

For the Love of Fiber


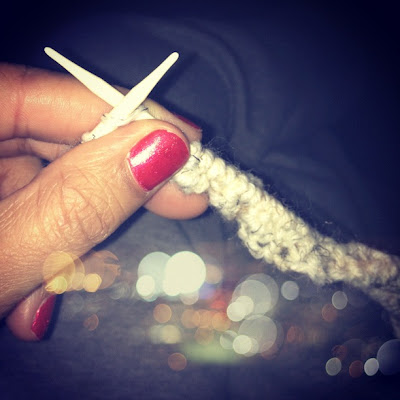
Any knitters out there? I became an avid knitter years ago when I started working at a local knit shop, Fine Points. When I started working there I just needed a job and my high school friend's mother was kind enough to hire me...even though I didn't know a thing about knitting.

On a slow afternoon at the shop, the ladies said to me "pick out some yarn, it's time to learn to knit!" And I did. I was a fast learner because I loved the challenge of learning something new, something that my grandmother used to do with ease. 


My favorite projects are usually quick and fun. While I can appreciate the feeling of accomplishment that you get after laboring over a complicated cable knit sweater, I tend to loose interest so it's better for me to stick with smaller things.


Hats, scarves, baby sweaters, toys, and accessories are the types of things that I like to make. Stay tuned tomorrow for a really quick and easy hair bow project!

Monday, March 26, 2012

Aw, Springtime in Cleveland


It would be difficult to find a Clevelander that did not lavish in the unseasonably warm weather that we had here the last week or so. It was sunny, warm, and beautiful. Usually these are not worlds used to describe spring in Cleveland, and especially not in March! But we were lucky.

So we spent many hours out walking and playing on the front porch enjoying the weather. Here are some shots from our walks on the paved paths along Horseshoe Lake last week.


The pinks, yellows, and greens were abundant. I hope your week is off to a great start! Happy Monday, friends!


Friday, March 23, 2012

Mustache Party


As promised, here are photos from the very well planned and crafted Mustache Birthday Party!


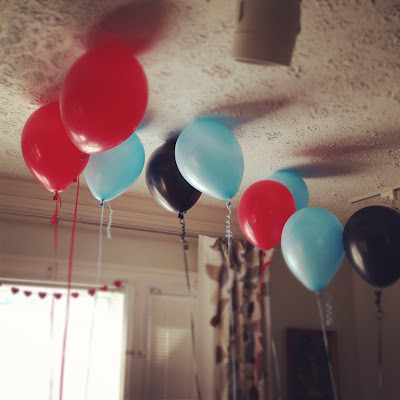
Tiny mustache flags were glued to toothpicks and put in every little cupcake.


She made more pennants and reused the heart garland from the baby shower.


We drew and cut out foam mustaches and glued them to sticks for some very funny photos! Check out my little guy in his bow tie and mohawk! (It just grows like that so we make the best of it :)


A fun time was had by all! Happy birthday little buddy, we sure do love you! Have a happy Friday!

Thursday, March 22, 2012

A Well Crafted Event


My friends and I hosted a baby shower over the weekend to great success! Our dear friend from California came home for the weekend so we could all celebrate the baby with them! We had a lot of fun making the decorations and planning the theme. We made pennants, strung hearts, made flower arrangements with hearts on a stick, and had so much fun spending time together. Here are a few snapshots of the day. 


Pennants
Decorative card stock
Hole punch
Twine
Ruler
Exacto knife

We used paper that measured 8 1/2 x 11 as well as paper that was 12 x 12. I cut the smaller paper in half and cut out triangles two at a time. Measure from the center of the paper and cut a diagonal line out to the edge. Punch a hole in each corner and pull the string through. You can cut out letters for the pennants or leave them as is. It's a simple and fun task that really makes for a festive event. String up and enjoy!


Wednesday, March 21, 2012

Before & After: Our House

To start this post out I have to give you a little background. We bought our house six years ago in the fall. It was in decent shape, needed a fair amount of cosmetic updating but seemed to be in pretty decent shape. Famous last words, right?

On a very sunny February morning we woke up to what can only be described as disaster. I noticed that the paint by one window in our bedroom appeared to be bubbling so I touched it...water burst out and that was the beginning of a very, very stressful eight months of repair work. Walls were crumbling, ceilings were leaking, and water was making itself known in every room. All of this was due to a very badly "updated" roof. The previous owners claimed to have put on a new one but it just wasn't the truth. It was a shoddy job that cost us an incredible amount of money. Lesson learned. 

From top to bottom this house has been updated, painted, shingled, dry walled, stained, insulated, and repaired. The majority of the work was done by my brother-in-law. And we ourselves have done a major amount too. So here are a few shots of the work we've accomplished over the years. 


The basement was a big open red space.


My husband erected walls, built rooms, closets, and made a crafting counter for me. I picked out the colors and promised to help paint...then I got pregnant so I pretty much got out of working down there at all.


The bathroom was a wood paneled lodge. There were railings all over the place and carpet hiding broken tiles. We brightened it up with paint and some elbow grease. Now it's a light filled space that is cheery in the morning.


The textured kitchen ceiling was bulging and sagging. It had track lighting that was pretty ineffective so we decided that since we had to bust it out, we'd have my brother-in-law put in can lights.


Now it's perfect. We also tore up eight layers of linoleum tiles to find a pretty nice wooded floor. We had it refinished and replaced the countertops too!


The second bedroom, along with the majority of the rest of the house was painted a dull beige color. We figured we could live with it. But once the water damaged happened it had to be fixed.


We found lots and lots of soaking wet wallpaper underneath. 


Now it's the baby's room. It's a cute little space with lots of room for playing. This is our home and I love it but we are running out of things to do!

If you are interested in any of the framed artwork, it can be found here, here, and here.


Tuesday, March 20, 2012

A Cozy Sweater


I've been dying to post about this little project but had to wait until after our little friend's birthday! A while ago one of my bff's pinned this little sweater on Pinterest and mentioned that she wanted to have a mustache themed birthday party for her little guy. So I of course got started making him the sweater that she mentioned in passing. I used the mustache template from the pattern I found but in order to make it more useful I altered things a bit and added long sleeves and a more masculine neckline. It was really fun to make and a thrill to give to him too!


Who would have guessed that it was going to be 80 degrees the day of his party though! He was kind enough to wear it for a few minutes before having to take it off. I couldn't quite snap a photo of him in it though but as you can imagine, he was a cutie!

Stay tuned for photos from the party later this week!


Monday, March 19, 2012

Where the Heart Is


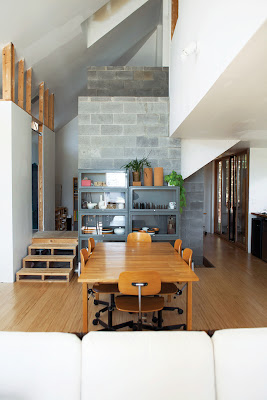
We are worker bees in this house. My husband, the planner and expert. Me, the spontaneous creative. Not to say he isn't creative, because he certainly is. We put a lot of blood, sweat, and tears into our home over the last 6 years. Gallons of paint, sheets of drywall, shingles, cement, mulch, spackle, and love. And for the first time, it's starting to feel small. I knew this was not going to be our home forever but the thought of moving seems incredibly difficult but ultimately it's what will happen. It will be with a heavy heart that we put a for sale sign in our yard. Luckily we are in no rush at all, it's just something we are talking about and it's been fun to see the homes that are out there right now. 

Starting fresh with a brand new to-do list sounds amazingly fun to my husband. And a little bit to me too. That's as far as we've really come at this point. I've been scanning around looking for inspiration at Dwell and finding amazing homes. It's definitely something to aspire to. 


Later this week I'll share some before and afters of our place. Happy Monday!


Image Source: http://www.dwell.com/articles/l-is-for-longevity.html, http://www.dwell.com/slideshows/plays-the-thing.html?slide=3&c=y&paused=true, http://www.dwell.com/slideshows/singapore-fling.html, http://www.dwell.com/slideshows/spirit-of-the-south.html?slide=3&c=y&paused=true

Friday, March 16, 2012

The Washi Tape Experience, Part 2


I can't get enough of this so bare with me! We were given this clown stool from a  lovely neighbor. I did not love it, but the stool itself seems pretty useful so I set it aside until I had time to fix it up a bit.


Supplies
Old stool (or whatever you have)
Washi tape
Acrylic paint
Paint brushes
Ruler

I painted the top of the stool black and also the crossbars and let it dry overnight. I've been obsessed with chevron patterns lately so I thought this might be a great opportunity to make my own. I used a ruler and pencil to measure and mark my design to make it easier to lay out the tape. Then I just started taping. These projects are pretty straight-forward and rewarding. I will have to try hard not to put tape all over everything I own.


Have you used this before? I'd love to see your projects too!