Showing posts with label construction. Show all posts

Monday, August 26, 2013

Being A Boy.


This little boy of mine is a huge fan of all wheeled vehicles. Trucks are really high up on the list so we were really excited to hear about the Cleveland Metroparks Touch A Truck event last weekend. Things started out a little rocky with a skeptical and hungry two-year old but once there was food in that belly he was ready to "be the driver!"


I don't know if I can fully explain just how excited he was...horns were blasting, levels were pulled, buttons were pushed. It was a good day. He was serious about his work getting done. Look at that little face!


I think that we got in every single vehicle there was to get in as Oliver declared "I'm the driver" every time. Happiness abounds in this truck heaven and Papa was a good sport to wear the construction hat as directed by the boss.


It was a great way to start off our Sunday. Thanks for having us Metroparks, we'll be back next time! Happy Monday!

Monday, July 22, 2013

Before and After: Laundry Room


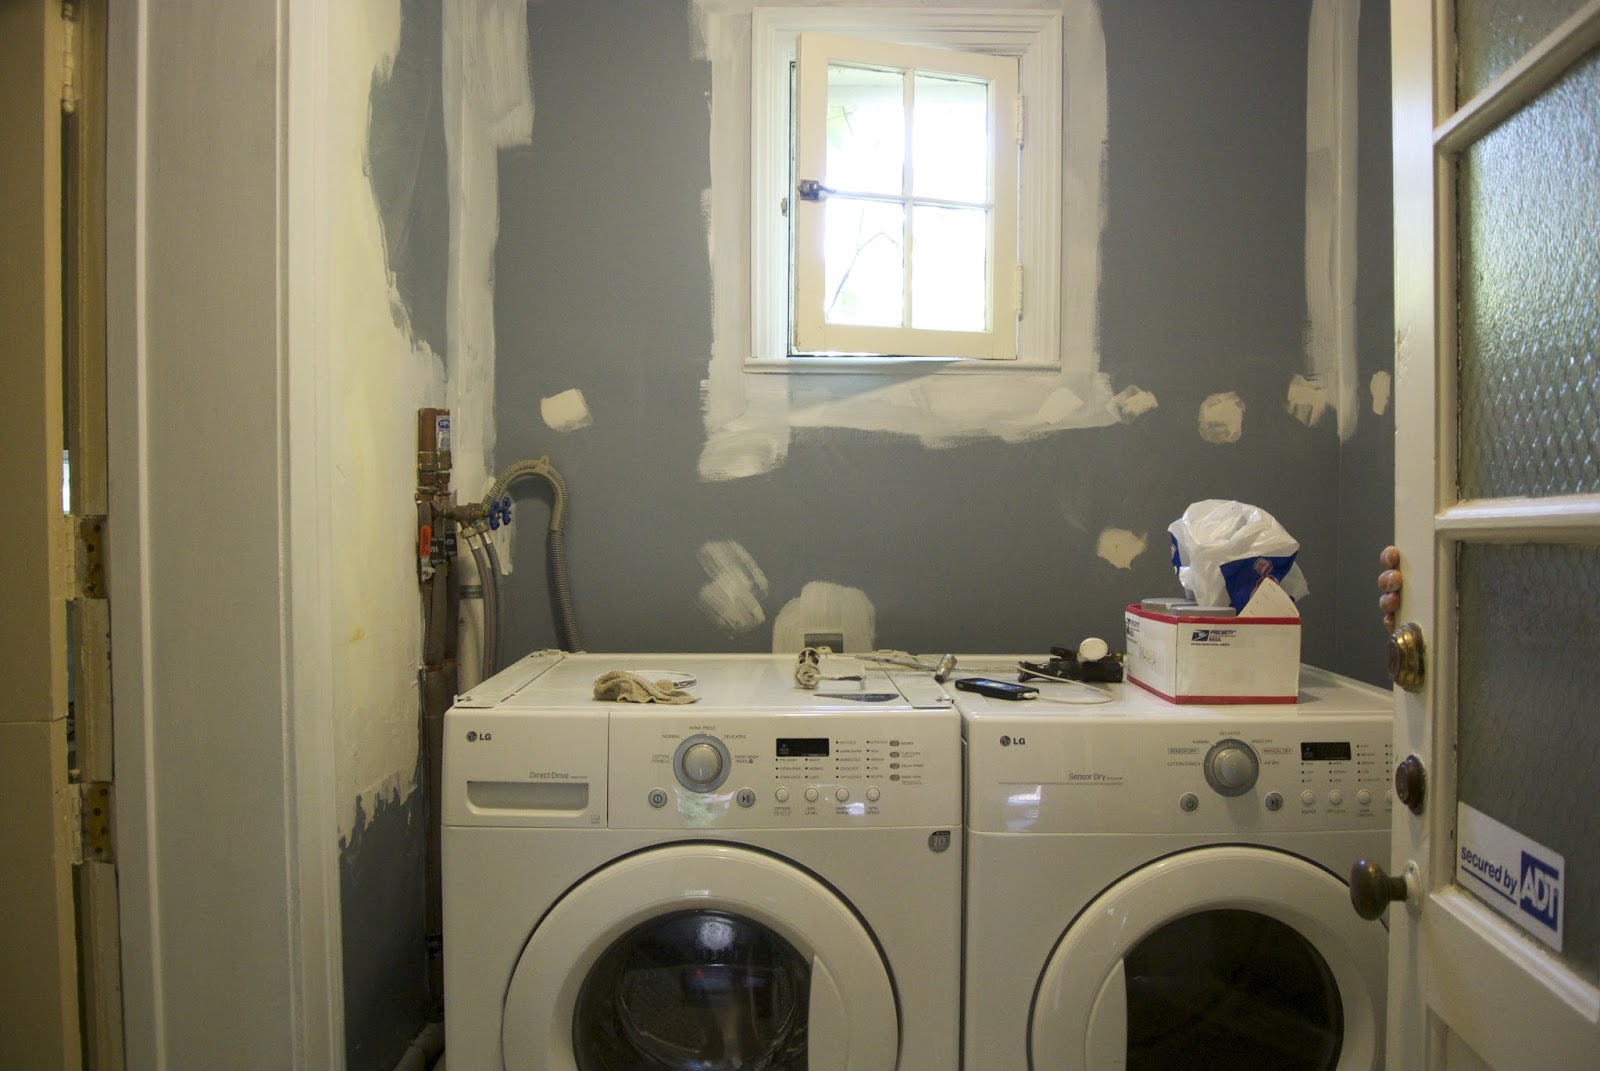
Happy Monday! JJ has been busy working on the house and yard so I wanted to share the most photogenic of the two completed projects. The other is a roof and it's not all the exciting to see. Behold, our shiny, new laundry room! One of the nicest features of the new house is the first floor laundry room! What a dream...I don't have to go in the basement and it makes things just a little bit easier.


When we moved in the room was fine but it had it's setbacks. Those white wire racks were falling out of the wall, the window in the back was covered in that protective plastic but had about one thousand bugs in it, and it just wasn't very inviting as the main entry to our home.


So JJ got to work painting and repairing the walls. We already our own washer and dryer so we gave the ones in the previous photo to my brother-in-law. The front loaders were just a little sleeker looking but didn't quite fit into the wooden braces that the previous owner had made.


We picked a brighter, cleaner blue for the walls and mounted hooks at our height and ones at O's height too. There is a cabinet with shelves for detergent and other laundry related things plus a bin that we use as a hamper. JJ built a shelf for the machines to sit on so I don't have to bend over and bump into the door behind me (gasp). Plus the cubby below is perfect for collecting our shoes! It's glorious. 


The only thing that we didn't replace is the floor, also known as JJ's arch enemy, but that will come. It's such a nice, functional room now. That husband of mine sure is handy!

Tuesday, July 24, 2012

Another Man's Treasure


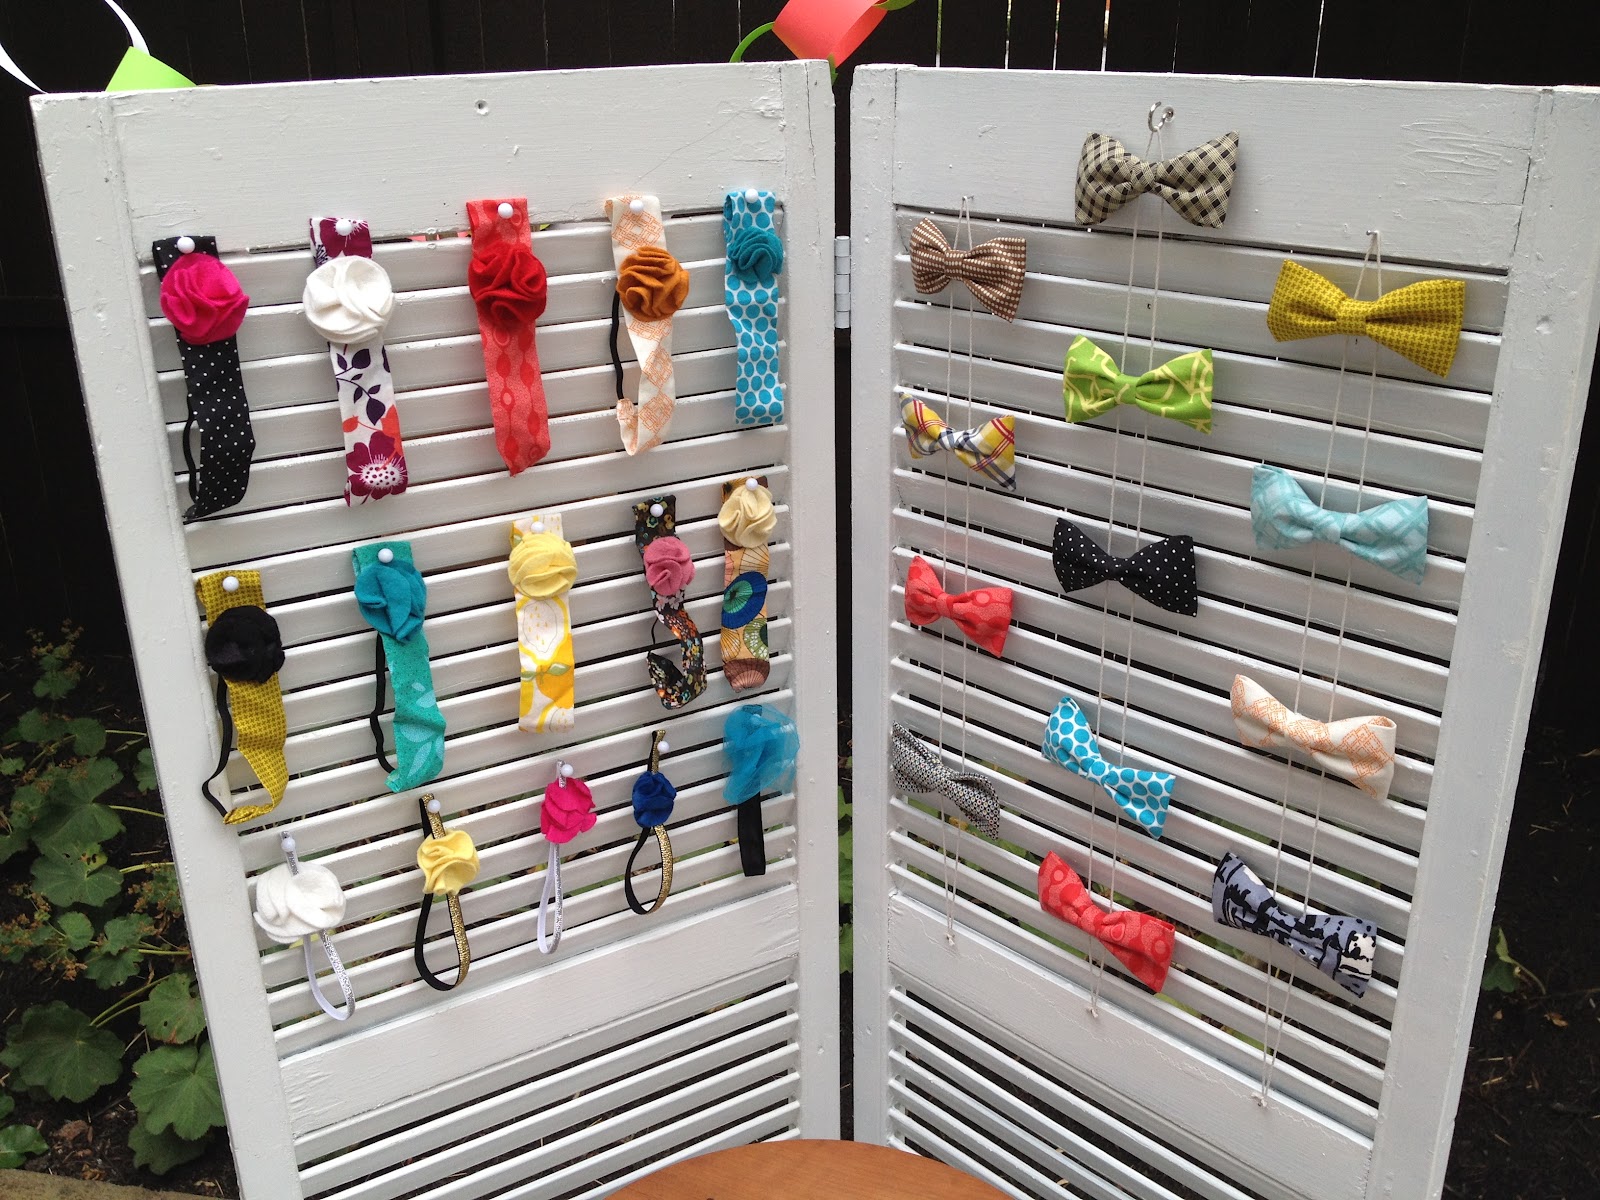
A few years ago my husband scavenged a half dozen or so shutters. They have been lying in wait for some time until now. I needed to have a set up for the show last week and I didn't really want it to just be on a table. We were checking out another craft show and with a few extra brains in the mix we came up with a plan. Here's what we did!

Materials
2 large shutters
2 hinges
Drill
Paint/primer
Nails
Twine
Tacks


We sanded and prepped the shutters and primed them awhile back when we had no idea what we were doing with them. And by "we" I mean the husband. Then I bought some spray paint to do my part and he took over. 


He attached two hinges at the top and bottom for easy assembly. I figured that I'd need some flat surface so I used this amazing handmade table that was a gift from our wedding.


I put in six nails and tied some twine to make it easy to display the bow ties. I say this as if it were my first thought, but it wasn't. There was some trial and error for sure! I used tacks for the headbands the night of the show and I was good to go! Set up and tear down was really simple and the shutters flow up flat quickly and fit right into my hatch back! And if you aren't in the market for a display, I think these would make a pretty cool room divider too!


Wednesday, March 21, 2012

Before & After: Our House

To start this post out I have to give you a little background. We bought our house six years ago in the fall. It was in decent shape, needed a fair amount of cosmetic updating but seemed to be in pretty decent shape. Famous last words, right?

On a very sunny February morning we woke up to what can only be described as disaster. I noticed that the paint by one window in our bedroom appeared to be bubbling so I touched it...water burst out and that was the beginning of a very, very stressful eight months of repair work. Walls were crumbling, ceilings were leaking, and water was making itself known in every room. All of this was due to a very badly "updated" roof. The previous owners claimed to have put on a new one but it just wasn't the truth. It was a shoddy job that cost us an incredible amount of money. Lesson learned. 

From top to bottom this house has been updated, painted, shingled, dry walled, stained, insulated, and repaired. The majority of the work was done by my brother-in-law. And we ourselves have done a major amount too. So here are a few shots of the work we've accomplished over the years. 


The basement was a big open red space.


My husband erected walls, built rooms, closets, and made a crafting counter for me. I picked out the colors and promised to help paint...then I got pregnant so I pretty much got out of working down there at all.


The bathroom was a wood paneled lodge. There were railings all over the place and carpet hiding broken tiles. We brightened it up with paint and some elbow grease. Now it's a light filled space that is cheery in the morning.


The textured kitchen ceiling was bulging and sagging. It had track lighting that was pretty ineffective so we decided that since we had to bust it out, we'd have my brother-in-law put in can lights.


Now it's perfect. We also tore up eight layers of linoleum tiles to find a pretty nice wooded floor. We had it refinished and replaced the countertops too!


The second bedroom, along with the majority of the rest of the house was painted a dull beige color. We figured we could live with it. But once the water damaged happened it had to be fixed.


We found lots and lots of soaking wet wallpaper underneath. 


Now it's the baby's room. It's a cute little space with lots of room for playing. This is our home and I love it but we are running out of things to do!

If you are interested in any of the framed artwork, it can be found here, here, and here.