Wednesday, February 29, 2012

Snack Attack


I am a serious snacker. I have found that since I've been home with the baby, I have a hard time figuring out what to eat for lunch if there are no left overs. I usually end up making something that is quick but not very filling so then there I am at 3:00 back in the kitchen.

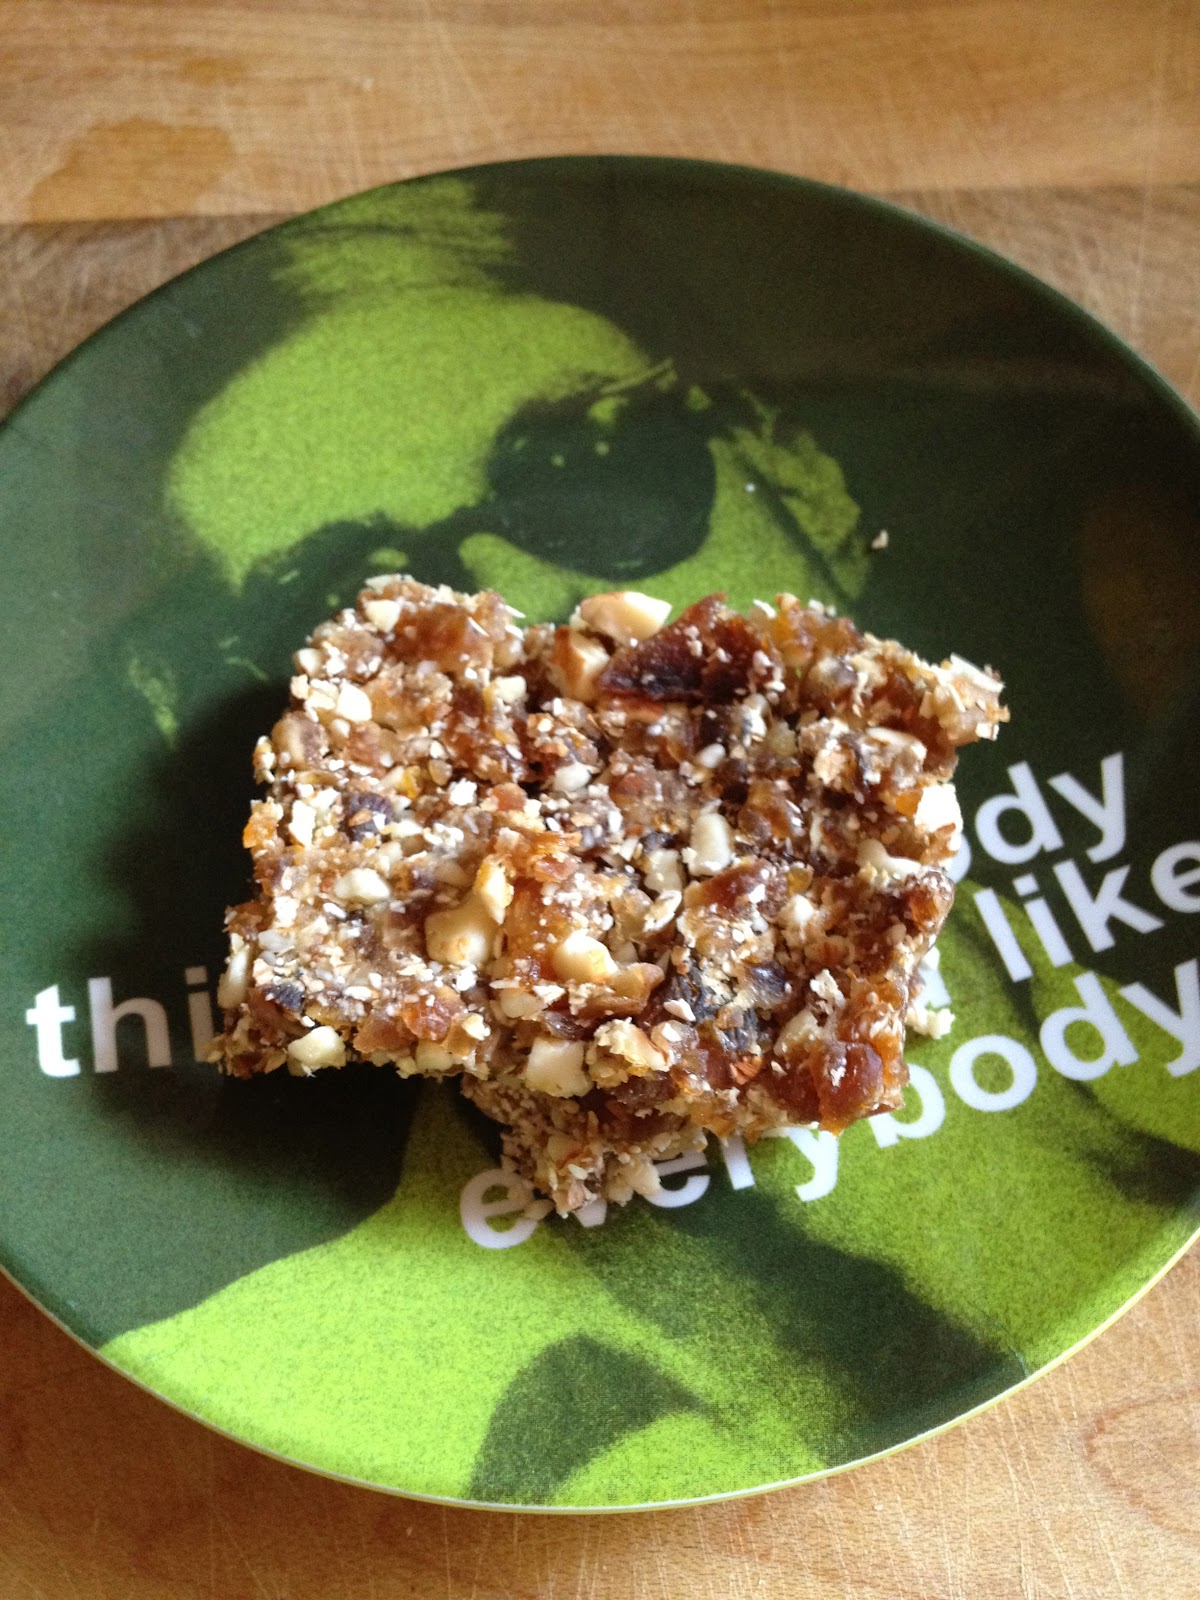
So I'm pinning my hunger squashing hopes to this homemade Larabar recipe that I found over on Little Monter, which she found over on Chocolate Covered Katie. It's really easy and super tasty! I made a few changes to the recipe based on my serious dislike of raisins and subbed in apricots instead and went with all almonds. Once my little man is a bit older, I think he'll like these too!


Recipe
1/2 cup quick oats
1 cup almonds
1/4 cup dates
1/4 apricots
1/4 tsp salt
1/4 tsp vanilla extract
2-4 Tbsp water as needed

Pulverize quick oats in a food processor. Add the rest of the ingredients minus the water and pulse until well combined. Line a 3x9 loaf pan with parchment paper and press the mixture into the pan. Add water if it's not workable. Or you can roll them into little bite-sized balls. Stick them in the fridge in an air-tight container and they should last at least two weeks. For my first attempt I made them into bars, but I think next time I'll try the balls and see how they work out. Mine were a little crumbly so I think a little more water would have done the trick. The vanilla extract sort of made them taste like raw cookie dough, yum. You can portion them out ahead of time for an easy snack on the go!

I also will make this disclaimer that the dried fruit makes these very sweet, so have a glass of water on hand. Enjoy!

Source: http://www.littlemonsterbaby.com/2012/02/homemade-larabars.html


Tuesday, February 28, 2012

Label It


If you are really into crafting and making gifts or especially if you are selling things it's important to have your own labels. There are some really great options out there now to make your own. And if you have a really great designer friend, they might help you out a bit. When I was selling things, it was really important to me to make it easy for people to find me again, so I had business cards made...but then I thought, wait, what if they lose this and still have the headband. So I had iron-in labels made for a really reasonable price. They are cute, easy, and really made me feel legit. I highly recommend it!
And if you feel inclined to look for my Etsy shop, you'll see that there is nothing in it...that's a whole other monster.

Monday, February 27, 2012

On the Table


I decided on the stuffed peppers. I think they were a hit and if nothing else they looked really pretty!


And Everything Nice

One of my favorite past times is crafting. I love to make things and I feel really good when I'm busy creating something. All of my son's little friends are turning one soon so I've been busy busy getting things together for their birthdays. I'll be sure to share things as they roll out. So first up is something for a little lady friend who will be one on Saturday. I used make headbands all the time and sell them at craft shows and in a few places around town and this little girl loves to wear headbands so it seemed like an obvious gift. I sure hope that she likes it!


Supplies
Wool felt
Scissors
Needle & thread
16" measure to fit if possible) Elastic band/metal snap clips
Hot glue gun
Beads, sequins


For this project I decided to keep it simple and make one large flower. I cut four large circles out of the felt keeping one for the base. Next, I folded the circles in half and then in half again and tacked them down to the base piece using matching thread. I arranged the circles in to three sections on the base and attached them all. Next, I sewed the piece of elastic together using my machine. Using a hot glue gun I attached the flower to the elastic band over the seam. Cut the EZ felt to cover the bottom of the flower in order to create a firmer base. Attach the EZ felt base to the flower with the hot glue gun.

If you are using a clip, cut a small hole in the EZ felt and slide the clip through and attach to the flower. Now you have a lovely gift!


Saturday, February 25, 2012

Peaceful Morning


We woke to peaceful falling snow this morning. Just the sight of it makes me happy to still be in my pajamas drinking coffee with the family. We've had an incredibly mild winter so far so I'm happy to see a little snow today. Grab a sled and enjoy your weekend!


Friday, February 24, 2012

On the Table: Weekend Edition

This weekend we are having my brother-in-law and his lovely girlfriend over for dinner. I'm deciding what we will make and it's between these two menus. And since it's a belated birthday dinner for our friend, dessert needs to be extra special!


Arugula Salad with Lemon Parmesan Dressing
Roasted Vegetable Lasagna from Joy of Cooking Vegetarian
Jeni's Ice Cream


Or...
Quinoa Stuffed Red Peppers
Simple Green Salad with Ginger Dressing
And the same dessert

Either way, it's bound to be a good time! Happy Friday.


Image Source: http://www.myrecipes.com/recipe/roasted-vegetable-lasagna-10000000640301/, http://www.theparsleythief.com/2009/09/arugula-salad-with-lemon-parmesan.html, http://www.jenisicecreams.com/categories/Collections/, http://www.vegetariantimes.com/recipes/10896, http://www.readymade.com/projects/edible_adventure_simple_green_salad_with_ginger_dressing

Thursday, February 23, 2012

From the Craft Closet: Stamped with Love.


Don't you just love getting mail?? I have always been a fan. I love to send it and I also love to find a nice surprise in the mailbox from time to time. Last summer I picked up this really great return address stamp on Etsy. I had been searching for the perfect one for years. It was a great deal and I use it all the time. Then for Christmas, I got this really awesome set of alphabet stamps that have been great for personalizing stationery and homemade cards.


When it comes to making your own stationery it's nice to have supplies on hand like mustache stamps or self portraits (how fun are those?!), ink pads, and craft paper. I am a collector of supplies so I often have all the things I need to make something special for a friend. Have you ever thought of making your own stamps? It's really easy if you have the right tools.


Supplies
Craft Paper
Ink pad
Carving tool
Wine cork, or Speedy Carve
Pencil

Simply decide on a design. It can be one simple shape like a heart or triangle or something a bit more complex like this goose neck bird. Draw out your design in pencil. Then use the carving tool to carve it out. Get out your ink pad and get to stamping! You can take it a step further and use a nice pen or marker to embellish it even more. I think the wine cork is a clever thing to use and it's free once the wine is gone.

Hope you like it!


Wednesday, February 22, 2012

Dancing Shoes


It feels a little cliche, but I do love a nice pair of shoes. As always, there will be weddings this spring and summer and I wouldn't say no to wearing any of these shoes to celebrate and dance the night away!


Source: http://www.toms.com/womens/ballet-flats-1/lina-woven-ballet-flats, http://www.madewell.com/newarrivals/shoesboots/PRDOVR~64229/64229.jsp, modcloth.com, www.miumiu.com

Tuesday, February 21, 2012

Smooth It Out.


I try my best to be a healthy eater, although I do appreciate a good dessert and french fries, I'm only human. Recently, we started making green smoothies for breakfast just to get in that extra serving of vegetables every day. Here are a few of my favorite recipes. I'm always up for new ones too, so please share them if you've got them!

Green Mango Smoothie
Handful of kale
Frozen mango chunks
Banana
Your choice of milk or water (I use soy, the husband uses 1%)

Blend until smooth.

Spinach Berry
Handful of spinach
Frozen raspberries, blackberries, or blueberries
Banana
Your choice of milk or water

Blend until smooth.

Green Berry Ginger
Handful of kale
Frozen raspberries
Banana
Peeled and chopped fresh ginger
Water

Blend until smooth.

The combinations are simple but endless. Enjoy!

Glowing


Wouldn't it be nice. Sometimes an image just speaks to me. This one speaks of warmth and love. I can imagine standing there and being in awe of what's below.


Source: http://belljarsf.com/blog/?p=2663

Monday, February 20, 2012

Got Photo booth?


One of my favorite things is a photo booth. I know that I'm not alone in this. I've been seeing them all over from weddings to parties in the last few years. Have you ever seen Smilebooth? Since I cannot just go out and purchase an in-home photo booth, I was very excited when I came across this tutorial on Pinterest to use with Instagram images. It's super easy and addicting! I've made a dozen or more of these in the past month and used them as favors in thank you notes for the baby's birthday. 

Tools:
Photo paper
Exacto knife
Ruler
Cutting mat

Select the four images that you'd like to use and open them in Photo Shop. Create a new template that measures 1 1/2 inches by 6 inches and a resolution of 800. Since the Instagram images are already squares you don't have to alter their size, however if there are borders that don't match up or you just want a white frame then you can use the cropping tool to remove the border. If you are using another type of image, then you need to resize them to measure 1 1/2 inches by 1 1/2 inches. Insert the images into the template leaving a small space between each one. You can create guides to help you place the images exactly where you want them.

Next, I created a new template that measured 4x6 to match the size of the photo paper that I have. This way you can print more than one image per sheet. Then drag the photo strip onto the larger file. Either save each strip as a file of it's own or reuse the main file as a template. 

Then I made a second strip and repeated the process and printed the image. If your printer isn't the best, you can always save the image as a jpeg and upload it to a processing site and have it printed elsewhere. Once you have the images ready, it's time to cut them into strips.

*Hopefully this all makes sense, but if it doesn't just ask! Have fun with this!


Friday, February 17, 2012

Bow Tied


While perusing Pinterest, I came across two really great bow tie tutorials, here and here. I have not always been such a fan of this style of dress for men, but what can I say, I'm a victim of peer pressure and trends. Now I think they are pretty swell. I took the information from the two blogs and created a mini bow tie for my little man. Here is how you do it.


Tools:
Fun fabric
Scissors
Needle & thread
Bow tie clips (found on Etsy)
Cardboard for a template, since I'm sure you'll make tons
Ruler
Iron

1. Cut the cardboard into two pieces, one that measures 9 x 4.5 inches, and the second to measure 1.25 x 2.5 inches. Cut two pieces of fabric to match. Fold the long edges of the larger piece in towards the middle and iron the edges down for sharp creases. Fold the shorter ends in towards the center and iron down the edges. 
2. Pinch the center of the tie together and sew the folds in place. Be sure that none of the frayed edges are visible. 
3. Sew the bow tie clip in place making sure that the stitches aren't seen on the front of the tie.
4. Fold the long edges of the small piece of fabric in towards the middle and iron in place. Fold in shorter edges and iron. Wrap the fabric around both the tie and the clip and stitch in place. Be sure that none of the frayed edges are showing.
5. Take a look at this cute little bow tie!
6. Repeat.

Stayed tuned for the next week's tutorial for photo booth strips!

Source: http://abeautifulmess.typepad.com/my_weblog/2012/02/how-to-make-a-bow-tie-.html, http://www.fineandfeathered.com/blog/2012/01/diy-hair-bow.html

Thursday, February 16, 2012

Centered

Yesterday work was cancelled. My son still went to his grandparent's house so that meant I had a few hours on my own. I got to enjoy a great yoga practice at one of my favorite studios in town. I came out feeling refreshed and energized. I hope to figure out a way to work yoga back into my life on a regular basis.
Source: Pinterest.com via images.search.yahoo.com


Wednesday, February 15, 2012

On the Table


For dinner on Monday, I made a pretty tasty ratatouille soup with eggplant, green beans, peppers, onions, and fire roasted tomatoes. Even as a vegetarian, I can sometimes be turned off by certain vegetables, namely eggplant. I love an eggplant parmesan but can struggle with eating just pieces of it cooked. To my surprise this recipe was pretty simple and really great. The baby even gobbled it up! I felt especially proud of myself because I utilized nap time well, and chopped all the veggies ahead of time.

Tuesday, February 14, 2012

Happy Valentine's Day!


Be sure to tell that special someone how much you love them, today and every day!

Image source: http://leloveimage.blogspot.com/

Go-To Gifts

This here is my favorite go-to baby gift. I keep packs of onesies in my sewing kit (ok, in a pile in the sewing area). I use Wonder Under for the appliqué then stitch around the shape to make sure it stays in place. One of my good friends makes these fabulous burp cloth sets with cotton chenille. I tie them up in a set and the gift is ready to go. Plus it's cute and useful. Do you have any go-to gifts?

Monday, February 13, 2012

The Office Makeover

Soon after we moved, in we had an unexpected amount of major work to do to almost every room of the new house. It was a tremendous amount of work that we luckily were able to get help with. Most rooms were complete except one, the office. We quickly slapped up some pale yellow paint that I didn't hate, but just never loved. We had a ridiculously huge and ugly desk left by the previous owners that we just kept. And so for 5 years, it was just a catch-all. Then one sunny Sunday in October, I'd had enough. I ripped out the carpet, removed old shelving and revealed...wait for it...quite a mess.

The floors were hideous, the wall was crumbling, and then the baby woke up. Great idea. So now what...well I'd fallen deeply in love with some wallpaper that I thought would be perfect for the only solid wall in the room. I needed it. I went to price it out and basically came home crushed. The amount of money to do one wall, just one, was way more than I was prepared for. 

There was still hope. I knew that I had that DIY stencil kit for all these years for a reason! Take that wallpaper. We made our own design based on the one I had fallen for, got the $3 tester paints from the store and went to work. The floors were then sanded and refinished, we got a rug, threw that horrible desk out on the curb, and here we are.

Happy in our new room. And it only took 2 months. Give me a break, we have a baby.

Saturday, February 11, 2012

Turning One

Last month our little man turned 1! We celebrated in high style with all his little friends in what could only be described as an octopus's garden. An octopus was his first favorite toy so we ran with the idea.

There were tissue paper pom poms.

My husband made this great, and very blue, cake and cupcakes to enjoy.

And enjoy he did! How do you celebrate birthdays in your family? Small gatherings or an all out bash? I'm a sucker for a good party myself.

Friday, February 10, 2012

Pick Me Up


I'm really dragging this afternoon and could use a pick me up! This red velvet cupcake and soy latte from Cupcake Royale in Seattle would be perfect! What do you like to have in as an afternoon snack?

A Little Valentine


Valentine's day is fast approaching. What will you be doing to celebrate? A quiet night in with a fire and cozy sweatshirt or a swinging party with your love? Either one would be nice. We'll be spending the evening in with our little one, a special carry-out dinner, and maybe a fire. Enjoy!


Thursday, February 9, 2012

The Envelope Please


I'm in the process of throwing a baby shower for a very dear friend that lives all the way across the country along with a few other friends. The theme will be books, which set us into a tizzy of ideas for the invites. I had the big idea to use old children's book pages to make the envelopes, well then that meant I'd have to make 25 or so envelopes....hmm. The best thing about working with others is they can reign you in when things are a little too lofty. Instead I found an old Dr. Seuss book at the local Goodwill and made envelope liners. Voila. I am pleased.

Materials:
Blank envelopes, I used Kraft paper envelopes.
Exacto knife and ruler or scissors
Cutting mat
Glue stick
Scrap paper
Old children's book or decorative paper

How To:
Trace the envelope flap onto a scrap piece of paper.
Use template and trace onto the pages of an old children's book, making sure that the template is slightly smaller than the actual envelope so it will still slide inside.
Cut out with scissors or exact knife and ruler.
Slide into envelope and use a glue stick to secure into place.